In this series of posts, we will examine some basic steps of getting started with Oracle SOA Suite. This first part deals with the software installation and configuration on a simple development environment running on Windows. Installing SOA Suite 11g is a series of steps that include a database installation, installation of WLS, installation of the SOA Suite software itself, creation of the repository and finally configuration. We will install the latest available version today, SOA Suite 11gR1 Patch Set 2 (11.1.1.3.0). Since SOA Suite 11gR1 Patch Set 2 (11.1.1.3.0) is a point release, installing it also requires that first SOA Suite 11g R1 Patch Set 1 (11.1.1.2.0) be installed and then upgrading it.
Main Theme
To install SOA Suite 11g R1 Patch Set 2 (11.1.1.3.0) follow the steps below in order:
1. Installation of WLS 10.3.3
The first step of installing SOA Suite would be to install WebLogic 10.3.3. It can be downloaded from the Oracle Fusion Middleware 11gR1 Software Downloads page. Start the installation of WLS by executing wls1033_win32.exe. Click Next on the first page and on the Choose Middleware Home Directory select Create a new Middleware Home. Enter the new middleware home directory.

On the Register for Security Updates page you can choose not to receive security updates and safely ignore the warning message that is displayed.

On the Choose Install Type you can select Typical.

Verify or change the installation directories on the Choose Product Installation Directories page.

In the Choose Shortcut Location page select "All Users" Start Menu folder.

Verify your installation selections on the Installation Summary page and click Next to start the installation.

2. Installation of SOA Suite 11g R1 Patch Set 1 (11.1.1.2.0)
You can download SOA Suite 11g R1 Patch Set 1 from the Oracle Fusion Middleware 11gR1 Software Downloads page. Once downloaded, unzip the ofm_soa_generic_11.1.1.2.0_disk1_1of1.zip file into a temporary directory and start the installation by going to the Disk1 folder and typing Setup -jreLoc %JROCKIT_JRE%, where %JROCKIT_JRE% is the location of the JRockit JRE.
Click Next on the Welcome page. After the successful checks for the necessary prerequisites on the Prerequisite Checks page click Next. On the Specify Installation Location ensure that you select the middleware home where you previously installed WLS 10.3.3, specify the home directory - defaults to Oracle_SOA1, and click Next.

On the Installation Summary page verify the installation selections and press Install to start the installation.

When the installation completes, click Next and finally Finish on the Installation Complete page.
3. Installation of SOA Suite 11g R2 Patch Set 2 (11.1.1.3.0)
Download SOA Suite 11g R2 Patch Set 2 from the Oracle Fusion Middleware 11gR1 Software Downloads page. Once downloaded, unzip the ofm_soa_generic_11.1.1.3.0_disk1_1of1.zip file in a temporary directory and start the installation by going to the Disk1 directory and typing Setup -jreLoc %JROCKIT_JRE%, where %JROCKIT_JRE% is the location of the JRockit JRE.
Click Next on the Welcome page. On the Specify Installation Location page middleware home and middleware home directory where you previously installed the SOA Suite 11g R1 Patch Set 1.

On the Installation Summary screen click Install to start the installation.

When the installation is complete click Next on the Installation Progress page and finally Finish on the Installation Complete screen.
4. Installing the Repository
Download the RCU Repository Creation Utility 11.1.1.3.0 from the Required Additional Software section of the Oracle Fusion Middleware 11gR1 Software Downloads page. Once downloaded, unzip the ofm_rcu_win_11.1.1.3.0_disk1_1of1.zip file in a temporary directory. Start the installation of the repository by going to the rcuHome\BIN directory and running the rcu.bat batch file.
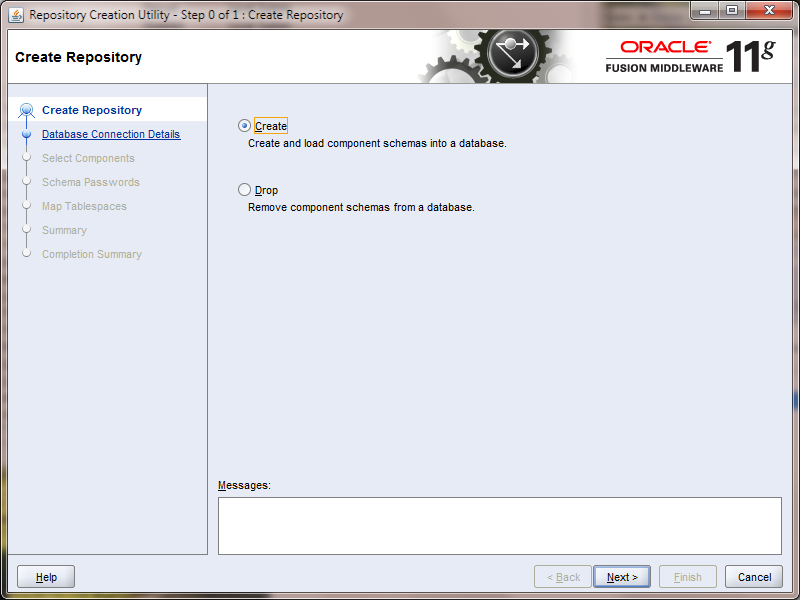
On the Create Repository page select Create.
Specify the database information in the Database Connection Details page and click Next.

RCU will start a series of prerequisite checks and inform you of the status.
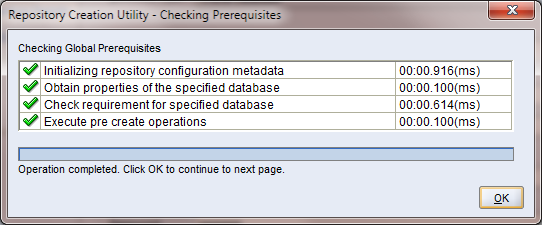
Click OK on the Checking Prerequisites dialog to proceed. On the Select Components page, select Create a new Prefix and enter a prefix or keep the default. Select the components to install from the Component tree and click Next.

RCU will proceed with checking the specific component prerequisites based on the components that you have selected. Verify that the prerequisites are all met and click OK in the Checking Prerequisites dialog.

On the Schema Passwords page, enter the passwords for the schemas and click Next.

Verify the tablespaces that will be created on the Map Tablespaces page and click Next.

After clicking OK on the warning regarding the creation of non-existing tablespaces, RCU will proceed with creating the necessary tablespaces. Once the tablespaces are created, click OK on the Creating Tablespaces dialog to proceed.

On the Summary page verify your selections and click Create to proceed with the creation of the repository.

RCU will now proceed creating the selected schemas. When done, a Competition Summary dialog is displayed.

5. Configuring SOA Suite 11g
Before using SOA Suite 11g, it must be configured. To start the configuration select Configure Application Server from the newly created Oracle SOA 11g - Home1 Start Menu.

This will start the Fusion Middleware Configuration Wizard. On the Welcome page select Create a new WebLogic domain and click Next.

On the Select Domain Source page select the products that will be supported by the domain and click Next.

Enter the domain name on the Specify Domain Name and Location screen and click Next.

On the Configure Administrator User Name and Password page enter the name and password of the domain administrator user and click Next. Select the domain startup mode and JDK on the Configure Server Start Mode and JDK screen and click Next.
On the Configure JDBC Component Schema page enter the SOA repository database connection settings.

If your connection details are correct, you should see a success check mark on the Test Component Schema screen.

On the Select Optional Configuration screen click on Administration Server and on Managed Servers, Clusters and Machines.

You can choose the default administration server name on the Configure the Administration Server page and click Next. On the Configure Managed Servers page, enter the names of managed servers.

Do not configure any clusters on the Configure Clusters page. On the Configure Machines page accept the defaults and click Next.

Accept the default configuration on the Assign Servers to Machines page and click Next.

On the Configuration Summary page verify your selections and click Create to start with the domain creation process. When all is done, you should see a Domain Created Successfully! screen.

This concludes the installation of SOA Suite 11g.
Conclusion
In this part we discussed how to install SOA Suite 11g R1 Patch Set 2 (11.1.1.3.0). In subsequent parts we will get into the details of how to use JDeveloper to develop SOA applications.
Until the next time, keep on JDeveloping!
 |  |
Well done!
ReplyDeleteThanks!
ReplyDelete